the recipe for the perfect wedding day timeline

I don't usually post recipes here, but I'm asked for this one a lot, so here it is. The formula for the perfect wedding day timeline is as follows:

wedding-timeline-guideline-casey-brodley-wedding-photographer-12.jpg

Ingredients:

One whole date to get married.

A dash of Google (for sunset time).

A full-bodied family shot list.

Your venue's end time.


Optional garnishes (for more flavor):

- A first look

- Old + New traditions during the reception

- A special exit

- 1-3 planning buddies with opinions*

*Suggested serving size for opinions: your fiancé(e), best man/maid of honor/immediate family member, a wedding planner or a photographer. do not exceed three people for timeline input lest you get too salty.

1. Start with your wedding date. What time will the sun set on that day?

casey-brodley-lake-michigan-wedding-photographers.jpg

Search "Sunset + [Your Wedding Date] + [Event Location]" to find the approximate time the sun will set on the day of your wedding. Ideally you will have this time to do portraits to take advantage of Golden Hour.

2. measure how long you want your ceremony to be.

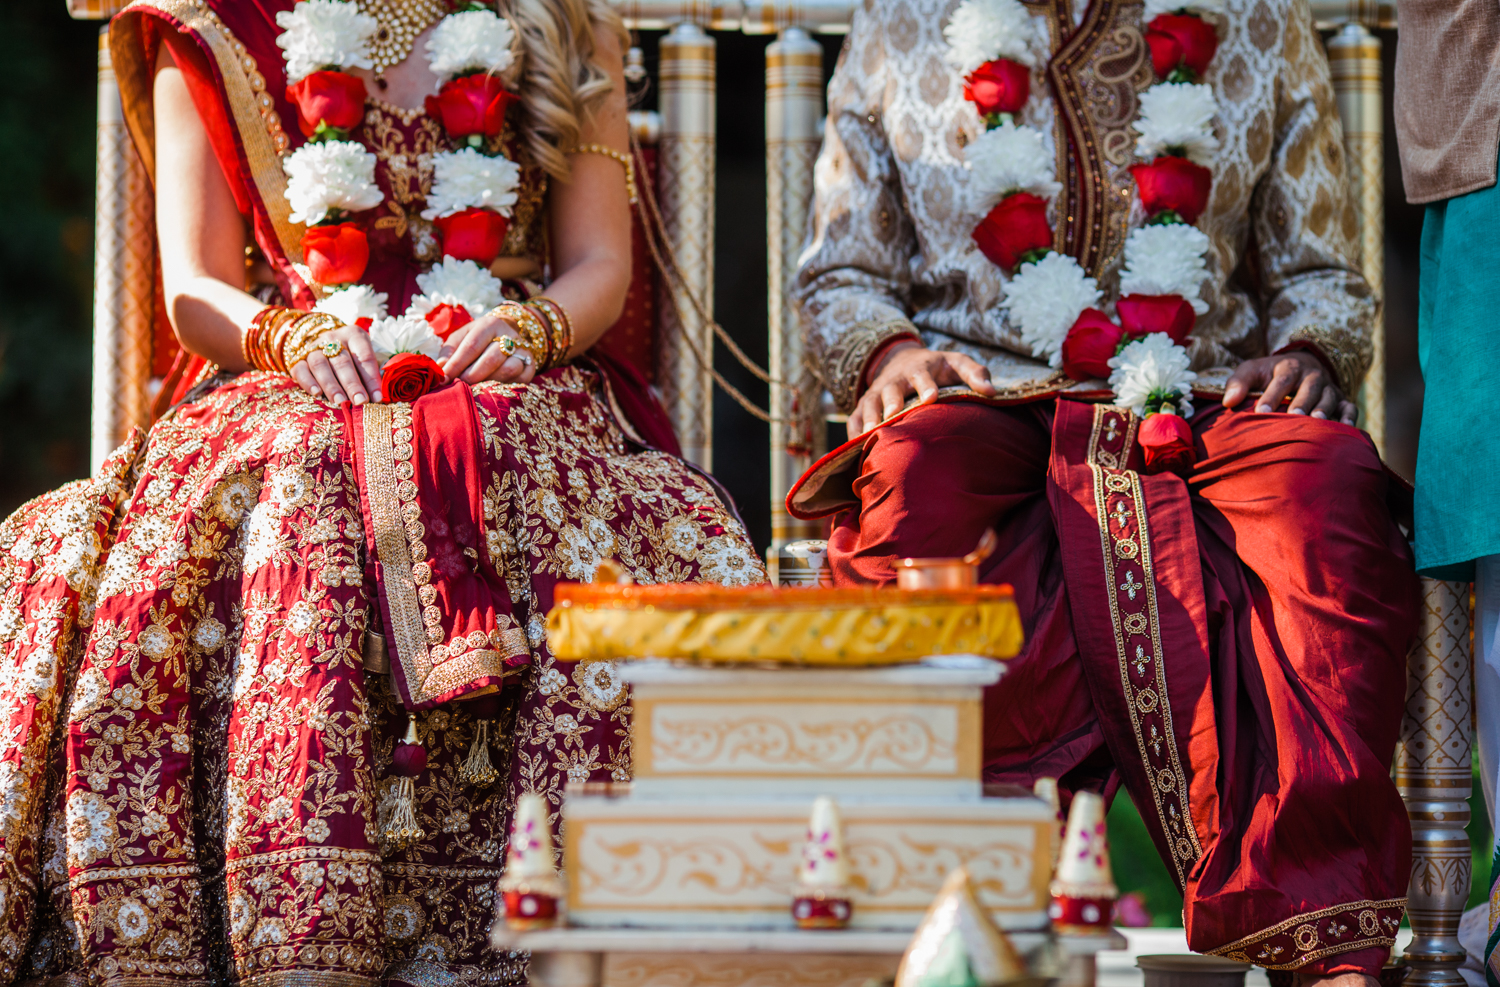
casey-brodley-best-michigan-indian-wedding-photographers.jpg

Some ceremonies are quick and to the point, others are filled with mini ceremonies, readings, traditions, and prayers that lengthen the run time. Ask your officiant how long your ceremony will take (or if you don't have one yet, the average time is 15-30 minutes for less traditional ceremonies, and 45-90 minutes for religious ceremonies). Once you know the approximate length of time, stick the start time before Golden Hour.

3. start the ceremony before Golden hour 

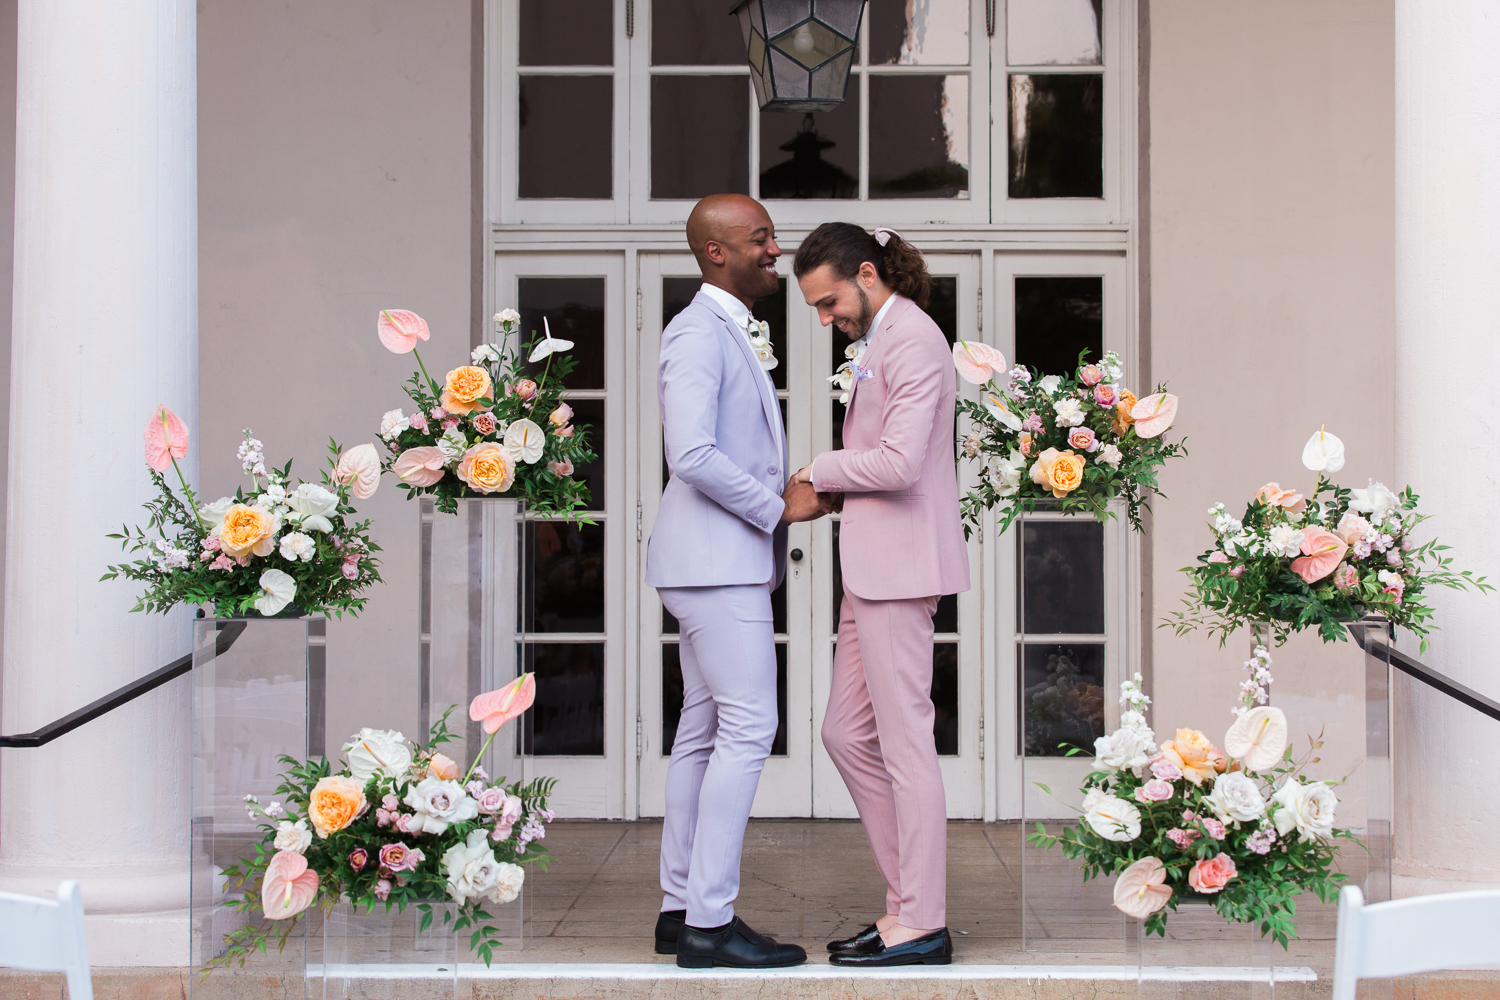
casey-brodley-midwest-michigan-same-sex-wedding-photographer.JPG

Now that you've figured out when the sun sets, count backwards two hours. This is the most ideal time of day for outdoor light, often referred to as "Golden Hour".

You'll want this time for family photos and couple's portraits. So, once you know how long your ceremony will be, place it right before the start of Golden Hour to have ample amount of time for portraits with the most ideal lighting after your ceremony. I like to also add a 15 minute cushion to the start time just in case of delays.

So, for example, a half-hour ceremony should be set to start no later than two hours 45 minutes before sunset (30 minutes for ceremony + 15 minute buffer). 

If you're getting married during the months when the sun sets earlier, consider doing a first look and family photos before your ceremony to save time and still grab those naturally lit outdoor photos.

*Your ceremony time is your mother dough for building out the rest of the timeline, so it's important to make sure it's set before continuing onto step 4.

4. Work backwards from your ceremony start time.

casey-brodley-best-detroit-documentary-wedding-photographers.jpg

Would you rather have family photos taken before or after the ceremony? See step 7 to estimate timing, but usually this takes about 20-30 minutes on average.

Do you plan on having a first look? This usually takes about 10-30 minutes and starts on average 1-2 hours before ceremony. See step 5.

How long will it take you to get ready? Talk to your hair/makeup artist (ideally during your trial run) about how long to expect your hair and makeup to take. Factor in anyone else getting their hair and makeup done with you. No matter what, you should always go last. This assures that your look is the freshest for the day. If you want to do a first look, your makeup should be done and you should be in your dress/suit no later than two hours before the start of your ceremony

5. Add in the time for the first look (optional)

casey-brodley-best-midwest-wedding-photographer-metro-detroit.jpg

Are you and your partner getting ready in the same spot? Or will you meet at the ceremony site? Make sure you factor in the time it will take to get to each other before your schedule the first look.

First looks don't take too long (about 5-10 minutes of time to see each other and get all the emotions out, then another 15-20 minutes for some portraits together.)

30 minutes should be plenty of time for a first look. If you plan on having one, add it in no less than 45 minutes before your ceremony start time, which ideally is before guests begin to arrive (to assure privacy).

6. Figure out how much of the getting ready process you need captured

best-detroit-documentary-wedding-photographer-1.jpg

If you want every detail from your rings to the ceremony site before guests arrive to you and your bridal party hanging out sipping mimosas, have your photographers start no less than 2 hours before your ceremony start time. If you're doing a first look, add in a half hour. If you are doing family photos beforehand, add in another half hour.

7. Make a Family Grouping List

michigan-wedding-photographer-best-midwest-1.jpg

This is the most varied portion of the day. Some couples have small families and it takes 15 minutes to pose everyone on their list. Others like to include every combination of everyone, and it can take upwards of an hour to capture.

To make a family grouping list:

Start by listing all your immediate family members on each side (anyone you need pictures with).

Add in names of any friends you also need photos with.

Mix and match these names so everyone is covered.

List individual photos as well as photos you want with your spouse in them (example: Bride + Mother of the Bride, Bride + Groom + Mother of the Bride, etc)

Add up the number of shots on your list of groupings. Multiply that number by 2 to have a good, safe estimate for how long that portion of the day will take.

Add this time in either immediately before the ceremony start or immediately following the ceremony.

8. Think about the traditions you want included in your reception

chicago-jewish-wedding-photographers-1.jpg

Will you have a first dance? What about family member dances? Bouquet toss? Garter toss? Anniversary dance? Cake cutting? Horah? Or maybe you want to have a surprise performance or unique game to personalize the reception.

Talk to your planner and DJ about the traditions you want to include, and what you want to leave out. Depending on how long you have your venue for, it's best to prioritize the traditional parts of the reception right at the start. Usually there is 2-4 hours of reception time, so try and do all the traditions and put them up front within the hour immediately following dinner and speeches so you can end with the dance party.

To save even more time, do the traditional dances (first dance, father/daughter, and mother/son dance) right when you do your grand entrance (before dinner service).

casey-brodley-metro-detroit-documentary-wedding-photographers.JPG

9. Sprinkle in the speeches

casey-brodley-wedding-photographer-los-angeles-web-1.jpg

Who do you want to give toasts? An average speech shouldn't last longer than a few minutes, but we all know those friends and family members who can speak for 45 minutes if given the opportunity. I recommend the speeches, blessings, and toasts all to be done once guests are seated for dinner. That will give you at least an hour to cover speeches from everyone, and you don't risk cutting into the time you'd rather spend dancing!

10. Top it all off with a special exit for garnish (optional)

best-michigan-documentary-wedding-photographer-1.jpg

This is a way to say "this is the end." Special exits tend to round out a story of the day, whether that's one dramatic photo with sparklers, or a special delivery of after-party food for your guests (a welcome surprise for anyone hitting that open bar!) This not only gives you something to look forward to at the end of the night, but also rounds out what can only be described as a "perfect day."

casey-brodley-wedding-photographer-documentary-ann-arbor-detroit-michigan.jpg

Now that you have the secret recipe, you are on your way to cooking up the perfect timeline! Just add in some personal touches, remove/add in what you need and don't need.

Run your timeline by both your photographer and coordinator to confirm you have ample time for everything.
Click here to view a sample timeline!

sweet baby angle {part 1: light}

{This is a series on my blog I've lovingly named Sweet Baby Angle (any Murderinos reading this?) where I'll dive into some tips and tricks for making your photos better and more socially acceptable.}

New band name, I called it.

New band name, I called it.

In the age of social media, we constantly see photos flashing in our eyeballs. Some are really beautiful, some are really funny, and some are what your former high school classmate ate this morning (spoiler alert: it's soggy-looking cereal. #breakfastofchampions #blessed).

It's easier to take a bad photo than it is a good one. Even Martha Stewart can make 5-star quality food look disgusting.

But imagine there was a way to make that boring bowl of cereal look as if Gordon Ramsey poured the milk himself.

lighting 101: the basics of finding the "pretty food" light

Pro tip: Always ask for a table by the window.

Pro tip: Always ask for a table by the window.

Seek soft, natural, indirect sunlight. 

There are a few reasons why natural light is my favorite to work with, especially with food: it's easily accessible, it makes colors look true to life and it is soft and flattering.

I can almost taste the pink champagne in this photo.

I can almost taste the pink champagne in this photo.

The indirect light is what you want to look for when photographing people (to avoid squinting) and food or other objects to avoid highlights being blown out, colors looking off, and too much contrast.

Dogs are naturally drawn to window light and I trust a dog's judgement more than most.

Dogs are naturally drawn to window light and I trust a dog's judgement more than most.

Avoid mixing Artificial Light with daylight

If I'm photographing something inside, I turn off any type of lighting that's on when the sun is out. Most artificial light gives off a yellow, magenta, or orange hue, while natural light tends to be cooler. And a fun fact about light is it bounces around like a bouncy ball on a trampoline. It reflects and refracts. Meaning, if you stand near a red wall, you will turn pinker because of the light bouncing off the wall and landing on you. Remeber the white/gold blue/black dress incident of 2015? Light can literally change the color that something actually is.

So turn off those lights (if you can), open up those shades, and plop your subject next to a window!

I turned off all the lights in the room for this photo.

I turned off all the lights in the room for this photo.

keep the flash off

Sometimes the sun just isn't out, or you're not close to a window-- but you really need to take that picture. Do me a favor and turn off your flash. Wait, don't panic! It's ok! We can do this together. Take a look around, and pay attention to the light that is available. Many times you don't need to turn your flash on when you're inside. A flash pointing straight at your subject can ruin a photo. Use available artificial light to your advantage. Seek out any light that isn't your camera's flash option, and place your subject next to it. 

This chandelier helped a brother out so much with this shot.

This chandelier helped a brother out so much with this shot.

keep the light at an angle. a triangle.

Most of my favorite photos always have the light source angled toward the subject at a 45° angle. 

giphy.gif

If you drew a line between the light source, the photographer, and the subject, it should always form a triangle. Position the light source off to the side of the camera, in-between you and your subject.

Facts: This was taken with the natural light at a 45° angle tip in mind. Also, Barry (right) weighs 100 lbs now.

Facts: This was taken with the natural light at a 45° angle tip in mind. Also, Barry (right) weighs 100 lbs now.

if you need to back light, block the light

A good way to blow out a photo is to point the lens right at the light. So if you wanna get all artsy fartsy and backlight your photo, make sure something is blocking the light from going directly into your lens at full force, or you risk losing detail in your subject.

Block the light source with an object in the background or the person/object you are photographing.

Backlighting with the tree mostly blocking the sun.

Backlighting with the tree mostly blocking the sun.

Letting too much light in can be distracting.

This is an example of how backlighting can ruin an otherwise cute photo. Looks like poor Olive lost an ear.

This is an example of how backlighting can ruin an otherwise cute photo. Looks like poor Olive lost an ear.

Try to diffuse the light as much as possible when you're outside.

I waited until the sun was tucked behind those clouds for this photo.

I waited until the sun was tucked behind those clouds for this photo.

When in doubt, find the shade.

Since I'm a huge fan of soft lighting, when I'm outside and the sun is bright I find the shade or a find a way to make shade.

los-angeles-lifestyle-photographer-casey-brodley-30.jpg

I could probably go even more in depth with lighting, but I think this covers the basics for now! 

Is there anything you want me to cover in the Sweet Baby Angle series? Let me know in the comments!

The simple advice that changed my life

casey-brodley-lifestyle-audrey-hepburn-bw-1.jpg

I posted on Instagram the other day about my mantra for 2018: Embrace the New. 

I've never been a huge fan of change, but I know it's a natural (and inescapable) part of life. Ten years ago I had no idea that I would live on the West Coast or the Mid West (I hadn't ever left the East Coast!), I never thought I would become a professional photographer, and I probably wouldn't recognize the person I've grown into. 

Embracing change and enjoying the new experiences is what 2018 is going to be about.

Real footage of all of us diving into 2018 head-first.

Real footage of all of us diving into 2018 head-first.

So for all of you making resolutions, mantras, goals, and plans for the upcoming New Year, I wanted to share a simple piece of advice that changed my life.

My husband is one of the few people who I trust for advice and someone I turn to when I am feeling really shitty about myself. He's my biggest cheerleader and he usually knows exactly what to say to put my mind at ease and not be so hard on myself. 

He also knows the exact things to say to frustrate me. And one of the most memorable times he did this ended up being the best piece of career advice I could've ever received.

It was summer of 2012, my grandmother (who I was incredibly close with) was dying, I was in a dead-end career, I had zero idea what I wanted to be or who I was. I wasn't living up to my potential, and my husband was fed up seeing me, day after day, complain about my job or cry because I hated going to work.

I had recently dusted off my camera and was trying to teach myself how to shoot again, and I took a few photos at my friend's wedding. Looking back at those photos now are embarrassing from how bad they are compared to my work now, but my friend loved them and I loved taking them. 

From my friend's wedding in 2012 (I was not the hired photographer... thank God.)

From my friend's wedding in 2012 (I was not the hired photographer... thank God.)

I mentioned to him one night that being a wedding photographer sounded like so much fun.

And that's when he said it. 

"Well, if you want to be a wedding photographer, then be a wedding photographer."

He made it sound so easy. It really pissed me off!

If I knew how to be a wedding photographer, don't you think I'd be one already?

But once we talked about it more, I realized that I was only seeing the end goal. There was a lot of work between where I was in 2012 and where I wanted to be.

So I broke it down into steps.

I read books on freelancing and business.

I researched wedding blogs and magazines and saved my favorite photos to vision boards on Pinterest for inspiration and guidance on posing and lighting.

I watched online courses from wedding photographers I admired.

I invested my free time to taking more photos, with a heavy focus on couples and portraits (aka, I made my friends pose for me when we hung out).

I bought a cheap wedding dress off Etsy and made my pretty friend model for me in it.

13269_10100336645811287_1954865266_n.jpg

I kept a full time job and dedicated every second of free time to being a wedding photographer.

I didn't let the fact that I didn't have any clients or experience stop me from being a wedding photographer.

Less than six months after that conversation with my husband, I booked my first wedding.

So, in a toast to a new start in 2018 (whatever that means for you) know that there isn't anything stopping you from following your heart and goals. 

If you want to be something, then just be it. And if you don't know HOW to be it, figure out how. Use Google. Read books, watch tutorials, get to work.

Break it down into steps, even if the first step seems so simple or small or far away from your end goal. Any step forward at all is a step closer than you are now.

Happy New Year, everyone!

Happy New Year, everyone!


a guide to understanding copyright {complete with baby animals}

This post is a doozy. So I've gone ahead and inserted GIFs of baby animals to take the edge off.

This sloth is in this for the GIFs.

This sloth is in this for the GIFs.

There is a lot of defensiveness and confusion around this subject. I know a thing or two about copyright after spending a few years chasing copyright infringement and sending cease and desists. It's easy to confuse what rights you do and do not have when it comes to working with a photographer, and it's even easier to do something you can get sued for, so it's important to get a handle on understanding it.

So let’s get into it, shall we?

fb45c2b67c63fa6285005a3ffdfb7839.gif

What does copyright mean?

Copyright means the legal right to reproduce, share, sell, print, display, alter or publish a work (which could be anything from a movie to a photograph, a piece of writing, music or any other form of art). The copyright holder is in control of where the work is used. This person can also authorize others to do the same.

Who owns the copyright?

In most circumstances copyright belongs to the creator. There are exceptions to every rule, but for the purposes of this post and to avoid confusion, it's safe to assume that the copyright holder is the person who made the work (ie the photographer)

This polar bear mom has copyright over her baby polar bear because she made him.

This polar bear mom has copyright over her baby polar bear because she made him.

why don't I get the copyright if it's a photo of me?

Model releases are signed often with any photo session. This releases the photographer from needing your permission every time they use a photo featuring you. 

i don't want pictures from my session being posted willy nilly without my consent. can I have the copyright?

Probably not without a hefty fee attached to it. Releasing copyright means releasing all rights to the image. That includes any money we can make off of prints, any revenue from future advertising or promotional work, any control over how our image is altered (after the hours of time we spend editing), etc. The list of reasons photographers don't like to release copyright goes on.

Talk to your photographer if you have concerns on how they will use the images from your session. Ultimately, we want you to be comfortable, and most of the time we are willing to work with you when it comes to how the image is shared.

Weeeeeeeeeeee.

Weeeeeeeeeeee.

sorry, I am not comfortable with signing a model release. What do I do? 

It’s safe to say you should never sign a contract you aren’t 100% comfortable with. If you can’t come to an agreement with the photographer, you should probably find someone else to work with. 

Or, set up a tripod or selfie stick and take your own photo and do whatever the heck you want with it. Problem solved. 

I only have low res, watermarked images. Can I print those?

Sure. Most of the time these are images meant for sharing online. Low-resolution means low-quality, so be prepared for pixelated prints. If you want to guarantee a beautiful, unwatermarked print, go through your photographer.

Look! It's Jon Hamm and a cute cub.

Look! It's Jon Hamm and a cute cub.

I want to share these online, can I remove the watermark?

No. Watermarks are used for this reason: to guarantee photo credit and prevent pirating of photos from third parties (like, if Buzzfeed were to pick up on it and make it viral). Only post what is given to you by the photographer, and for the love of God don't put a filter on it.

but my friend is really good at photoshop. Can I ask someone else to edit it for me?

Please don’t do this. If you aren’t happy with an edit, talk to the photographer. You paid them to edit the photo, and all that extra $$ is worthless the second you or someone else (even an app) slaps another edit on top of it. 

An instagram filter is like someone drawing a mustache on a perfectly good photo.

ok, sometimes mustaches make things better. touche, cat.

ok, sometimes mustaches make things better. touche, cat.

What if i find a photo on Google? Can I use that photo?

Probably not. In general, if you are not the copyright holder it's safe to assume you do not have permission to publish, print, or share the image/work.  But you can do an image search to specifically find fair use.

To access this hack, go to the "Advanced Search Settings" in Google's image search and select the specific usage you need. Voila.

Screen Shot 2017-12-19 at 12.05.02 PM.png

Also, you can check out Creative Commons for totally legal-to-use material.

wait... how come you can use GIFs in this blog post? 

Fair use.

Stay with me here.

Stay with me here.

what? explain this to me like I'm five.

Copyright means you are in control of how the work is used/shared.

A license is written permission to use an image/work for something specific. For example: a music license is given for use of one song in a single video, a commercial license is given for use of a work in advertisement. Usually you need separate licenses for different uses.

Personal use usually only covers posting on your personal social media. This is not the same as a print release.

A print release means you are given a print file you are able to print from. This file may not be larger than a certain size. A print release does not give you permission to give that file to anyone else without permission from the copyright holder.

A model release is signed if you are in the image. It means you accept the terms of usage and accept that you are not the copyright holder of the image. You release the right to control what happens to that image/work.

Fair use is when the original material is used for a limited and "transformative" purpose, such as commentary, criticism or parody.

This GIF is fair use, muthafuckaaaa

This GIF is fair use, muthafuckaaaa

OK, I think I understand copyright now, but can you list the copywrongs?

- editing an image without permission from the photographer (e.g. Instagram filters, removing watermark, any sort of app filter or manipulation)

- Removing a watermark 

- Printing images without a print release 

- Using or giving away photos or files for any purpose without permission from the copyright holder

- submitting photos for publication without permission from the photographer

-doing pretty much anything without the written consent of the photographer/creator

Sum this all up for me in one sentence.

When in doubt, reference your contract terms or ask the person who made the image/work.


d36011c6f46ece68a7df8927a5f06a89.gif

You made it! I hope this was helpful.

If you have other questions, let me know in the comments!

the camera doesn't matter

Buckle up, buckaroos: I'm about to drop some deep knowledge on you because I'm feeling existential AF.

So you know how sometimes Facebook ads are so well targeted that you think they are speaking directly to you? Like those addictive looking blackhead masks that peel off your face. You know what I'm talking about.

Anyway, I was scrolling my feed and I saw an ad for this class with Annie Leibovitz. I obviously stopped and turned up the volume, because when Annie Leibovitz speaks you show her some goddamned respect.

Annie Leibovitz is basically Yoda to me.

Annie Leibovitz is basically Yoda to me.

Not only did I want to immediately buy this class (which I didn't), she made a comment that I really related with. She said she's not a technical photographer, meaning she doesn't like to talk on and on about the gear she uses.

"If that's what you're thinking about," she explains, "you're not taking pictures."

casey-brodley-photographer.gif

I am in several photography and small business groups on Facebook full of creatives and I see little debates pop up all the time. Canon or Nikon. Black and white or color. Beyoncé's maternity photos or Beyoncé's newborn photos.

One popular topic photographers especially like to hate on: the iPhone as a camera. There is a growing opinion that iPhone = shitty pictures. In this day in age, more and more people have access to a camera and are able to document their lives. Yet instead of celebrating this or feeling motivated to become a better photographer, I still see comments like, "Anyone can take a photo with an iPhone," or, "There's no skill to it." This disdain comes off as insecurity at best, egotism at it's worst.

The new iPhone X came out recently and I would be lying if I said I wasn't impressed by the picture quality. But I'm not intimidated by its awesomeness.

I once was shooting for a shoe designer in LA, and while I was setting up and styling  the shot, her assistant leaned in, snapped a photo of my setup with her phone, and put it on Instagram. She then turned to me asked a question that I'll never forget:

"Aren't you afraid an iPhone is going to take your job one day?"

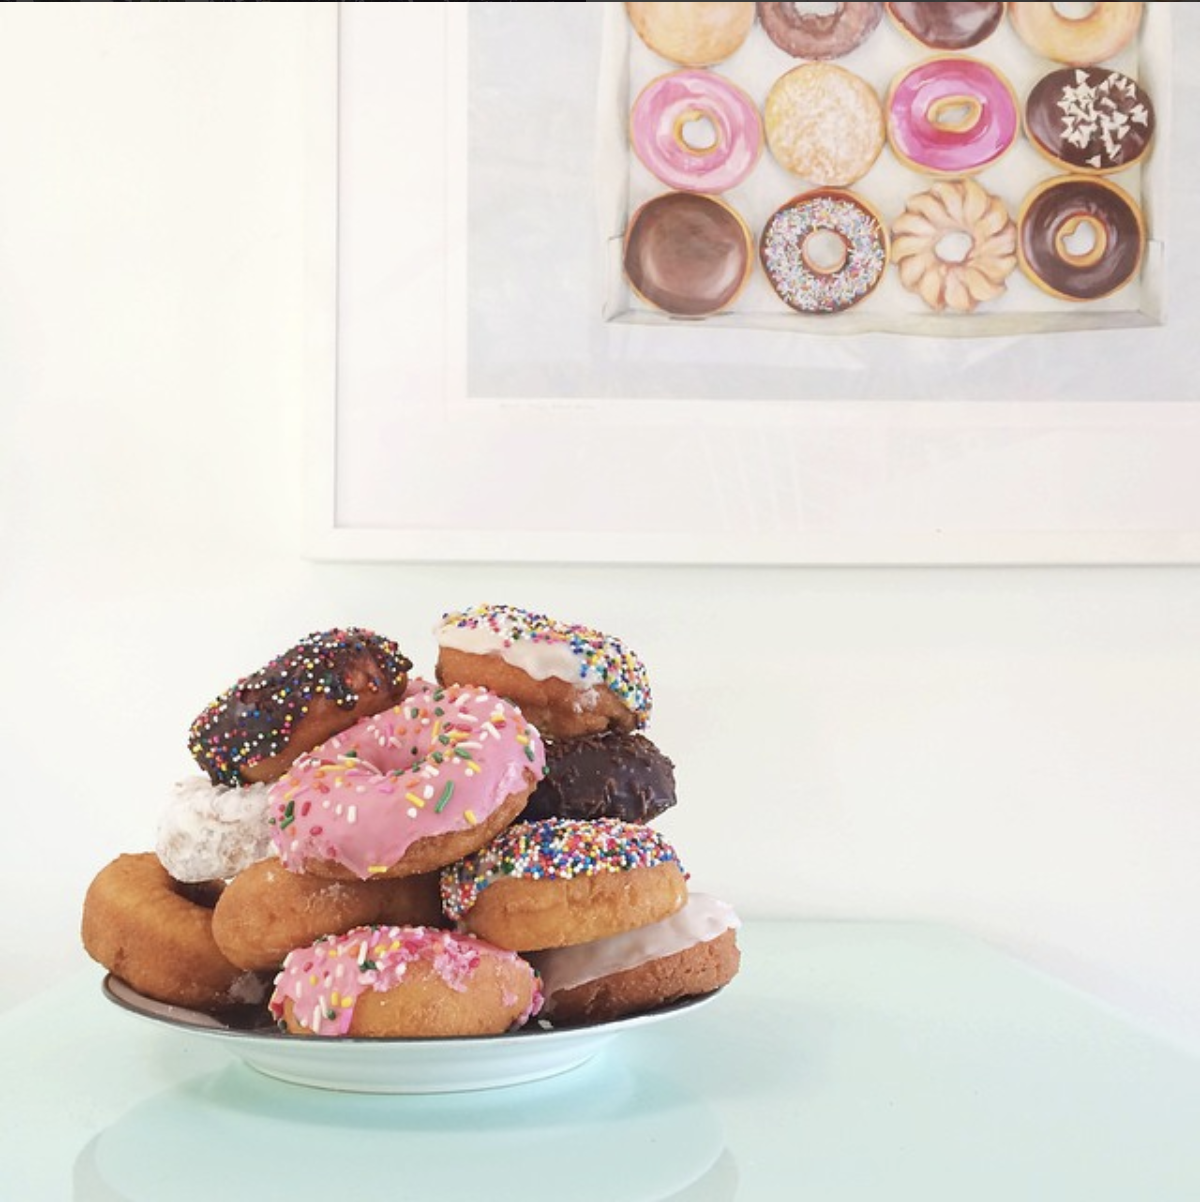
This photo of donuts was my most popular photo on Instagram in 2014. I took it with an iPhone. 

This photo of donuts was my most popular photo on Instagram in 2014. I took it with an iPhone. 

Do I honestly believe a handheld robot would take my job? Of course not. An iPhone cannot move around and snap the photo on it's own (not yet, anyway). But do I think one day an iPhone could be a viable option for a professional camera?

Absolutely.

In any industry we would be hiding our heads in the sand if we ignored progress in technology and didn’t plan for it to affect us. Just look at the coal industry. The only solution is to continue to learn and become better.

The photo above might look simple, but I didn't just take a photo of a plate of donuts. I put that plate on top of a refrigerator, because that's where the best light was. I switched out the art behind the donuts, because it made more sense than what was there in reality. I thought about the colors and the theme and I framed it purposefully. 

Which brings me to a simple math equation:

Intention/Donuts > Camera choice

I took this photo on my iPhone when I was in France. My mother asked for a print of this photo over a similar photo I took on my professional film camera.

I took this photo on my iPhone when I was in France. My mother asked for a print of this photo over a similar photo I took on my professional film camera.


The more I think about it, the less intimidated I am about anything or anyone taking my job. I'll tell you why, baby angels.

In reality, the camera doesn't matter. The person behind the camera is calling all the shots. Literally.

I currently shoot weddings on a Canon Mark IV (my husband surprised me with it last month because he loves me so much and he's the best husband ever). A couple months ago, I shot them on a Mark III. Before that a Mark II and before then a 7d. I often bring along my completely manual Hasselblad from 1962 to weddings , because my clients like the look of what that camera produces. I have photos in my portfolio from the first wedding I ever shot. 

A photo taken with a camera that doesn't even have a screen.

A photo taken with a camera that doesn't even have a screen.

I could walk down the street and ask a stranger to stand next to me and take a photo of a fire hydrant at the same time. I bet you that person would frame, angle, focus, and approach the subject differently than I would. 

A good picture is a good picture, and a good photographer is a good photographer.

casey-brodley-wedding-photographer-michigan.gif

You see, the insane, beautiful, magical thing about photography is that no one can completely duplicate someone else's image. They could frame it the same way. They could imitate the lighting and the posing choices. But it will never be the exact same picture.

I'm confident in my work, and my ability to take a picture. The camera I use is just a tool, and I can take a good photo or a bad photo with just about anything.
As an artist, there is always room to challenge yourself to be better. It’s one of the reasons artists are collectively so unhappy. We are constantly trying to one-up ourselves. So we can blame a camera all we want on why we are losing out on work, but in reality we just need to go with it and use it as a reason to grow. Become the best iPhone photographer ever. Keep looking for the best light. Don’t rely on filters to “save” an image. 

Because a bad photo with a filter is still a bad photo with a filter. 

The camera doesn’t matter. It’s how we use it that matters. And as long as we only compete against ourselves (and not other photographers or technology) an iPhone will never take your job.

After all, I will never be Annie Leibovitz, and an iPhone will never be me.